
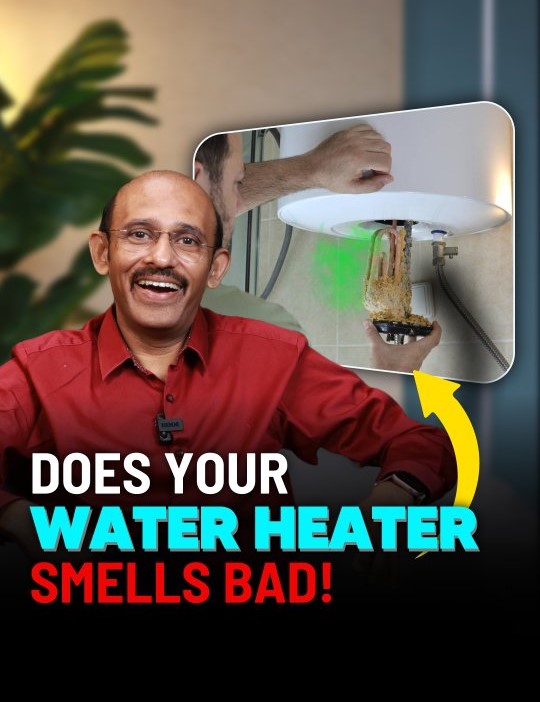
Why Does My Hot Water Smell Like Rotten Eggs? The Definitive Guide to Fixing Smelly Water Heaters
There is nothing quite like waking up in the morning, stepping into the bathroom, turning on the shower, and being hit instantly by a wave of hot water that smells like rotten eggs. Instead of feeling refreshed and clean, you end up holding your nose and wondering if something has crawled into your plumbing lines.
This is an incredibly common complaint among homeowners worldwide. When people notice this sulfur-like odour, their first instinct is usually to panic, blame their municipal water supply, or run out to buy an expensive external water filter system.
However, if the foul odour only happens when you turn on the hot water tap—while your cold water smells perfectly fine—the root cause isn’t your main water line at all. The culprit is a hidden chemical reaction occurring inside your water heater or geyser.
Let’s dive deep into the plumbing science behind this nasty odour, figure out exactly why it happens, and look at the permanent solutions to fix it.
How to Confirm the Source of the Smell
Glass 1 (Cold Water): Go to a tap, turn on the cold water, let it run for 30 seconds, and fill a clean glass. Step away from the sink area to smell it.
Glass 2 (Hot Water): Turn on the hot water tap, let it run until it’s hot, and fill a second glass. Walk away from the sink and smell this one.
If both glasses smell, the issue lies within your well or municipal water source itself, meaning you will need a comprehensive whole-house filtration or chlorination system.
If neither glass smells but the sink area does, the odour is likely coming from bacteria growing in your sink drain trap. Pouring baking soda and vinegar down the drain will usually fix this.
The Hidden Role of Sulfur-Reducing Bacteria (SRB)
The rotten egg smell isn’t just a chemical accident—it is often biological. Sulfur-Reducing Bacteria (SRB) thrive in low-oxygen environments, such as deep wells or the bottom of water storage tanks.
These bacteria feed on the dissolved sulfur naturally present in groundwater. When they interact with the hydrogen gas generated by a degrading magnesium anode rod, they accelerate the production of Hydrogen Sulfide ($H_2S$) gas. Because these bacteria love heat, a water heater kept at a standard temperature (around 48°C to 50°C or 120°F to 130°F) acts as a perfect incubator.
The Collection Hazard: What Is Actually Lurking on Your Roof?
Even if you live in an area with incredibly clean air, the biggest safety risk to rainwater happens right as it hits your home.
[Pure Atmospheric Rain] ➔ [Strikes Polluted Roof Tile] ➔ [Gathers Biological/Mineral Waste] ➔ [Contaminated Tank Storage]
Most domestic rainwater harvesting setups utilise the wide surface area of a home’s roof or terrace to channel rainwater into a central storage tank. Unfortunately, your roof is far from sterile. Between rainstorms, it accumulates a thick layer of contaminants:
Animal and Bird Droppings: A major source of dangerous pathogens like E. coli and Salmonella.
Decomposing Organic Matter: Dead leaves, rotting twigs, and insects create a perfect breeding ground for mould, fungi, and bacteria.
Chemical Leaching: Modern roof coatings, asphalt shingles, and plastic gutters can leak heavy metals and chemical compounds directly into the runoff water during hot weather.
A Complete Comparison: Sacrificial vs. Impressed Current Anodes
When choosing a long-term solution for tank protection, you essentially have two technologies to pick from:
┌➔ Sacrificial Anodes (Magnesium/Aluminum) ➔ Corrode naturally to protect steel
Anode Protection ─┤
└➔ Impressed Current Anodes (Titanium) ➔ Use low-voltage electricity; never degrade
1. Sacrificial Anodes (Magnesium & Aluminum-Zinc)
These rods function on the principle of galvanic corrosion. Because magnesium and aluminium are less noble metals than the steel tank, the electrical current flows from the rod to the steel, causing the rod to sacrifice its own structure over time.
2. Impressed Current Anodes (Powered Titanium)
Powered anodes do not rely on chemical degradation. Instead, they feature a titanium rod connected to a small wall plug adapter. The adapter sends a continuous, controlled low-voltage electrical current through the water to protect the tank lining. Because titanium doesn’t break down, it can last for decades and never creates the hydrogen gas that feeds sulfur bacteria.
Essential Maintenance: How to Flush Sediment From Your Tank
Even if you replace your anode rod, mineral sediment (lime scale and calcium calcium buildup) will naturally collect at the bottom of your water heater over time. This sediment traps bacteria and reduces your heater’s energy efficiency. Flushing your tank once a year keeps your water clean and extends the lifespan of the appliance.
[Turn Off Power/Gas] ➔ [Attach Garden Hose] ➔ [Open Drain Valve] ➔ [Flush Until Clear] ➔ [Refill & Restart]
Safety First: Always turn off the electricity at the breaker panel (or shut off the gas valve) before draining your heater. Running a heating element in an empty tank will quickly burn it out.
The Flushing Process: Attach a standard garden hose to the drain valve at the base of the heater and run the other end to an outdoor area or floor drain. Open the valve and let the water run until it flows completely clear of white mineral flakes.
Would you like step-by-step instructions on locating and safely replacing the anode rod for your specific water heater model?
How to Safely Replace Your Water Heater’s Anode Rod
Replacing a faulty or reacting magnesium anode rod is the most permanent way to eliminate that stubborn sulphur odour once and for all. If you are handy with basic tools, this is a straightforward DIY project that can save you an expensive plumbing visit.
Tools and Materials Needed
New Anode Rod: An Aluminum-Zinc alloy or a Powered Titanium anode rod.
1-1/16 inch Socket Wrench: Standard size for most water heater anode hex heads.
Breaker Bar: To help loosen tight, factory-sealed threads.
Teflon Thread Tape: To ensure a watertight seal on the new rod.
Garden Hose: To drain the top portion of the tank.
[Turn Off Power & Water] ➔ [Drain Top 10% of Tank] ➔ [Loosen Hex Head with Breaker Bar] ➔ [Pull Old Rod / Install New Rod] ➔ [Refill & Restore Power]
1. Turn Off the Power and Water Supply
Safety is your first priority. If you have an electric geyser/water heater, flip the dedicated breaker switch on your main electrical panel. If it runs on gas, turn the control valve to the “Pilot” or “Off” setting. Next, tightly close the cold water inlet valve leading into the heater.
2. Partial Drain of the Tank
You do not need to drain the entire tank to change the rod. Attach your garden hose to the drain valve at the bottom of the heater and open it to remove about 2 to 3 gallons (approx. 8 to 11 litres) of water. This drops the water level safely below the top cap threads so it won’t overflow when you pull the rod out.
3. Locate the Anode Hex Head
On most modern storage water heaters, the anode rod is integrated directly into the top of the tank. It usually looks like a small hexagonal bolt head sitting flush against the top plastic cover, or hidden just beneath a removable plastic cap labelled “Anode.”
💡 Tech Tip: If you can’t find a separate hex bolt on top of your unit, your system might use a “Combination Anode.” This is an anode rod built directly into the hot water outlet nipple. You will need to disconnect your hot water plumbing line to unscrew it.
4. Loosen and Remove the Old Rod
Because these rods are sealed tightly at the factory, they can be stubborn to loosen. Slip your 1-1/16 inch socket wrench over the hex bolt and attach a breaker bar for leverage. Hold the water heater steady to keep it from twisting while you turn the wrench counterclockwise to break the factory seal. Once loosened, slowly pull the long, corroded rod straight up and out of the tank.
If your ceiling is too low to pull a rigid 4-foot rod out, you can bend the old rod as it emerges, or cut it into sections with wire cutters to remove it.
5. Prepare and Install the New Rod
Wrap the threads of your new Aluminum-Zinc or Powered Titanium rod clockwise with 5 to 6 layers of Teflon thread tape. Lower the new rod into the tank opening. Hand-thread it clockwise first to make sure it doesn’t cross-thread, then use your socket wrench to tighten it firmly until it feels snug.
6. Fill the Tank and Restore Power
Turn your cold water inlet valve back on to fill the tank completely. Crucial step: Open the hot water tap on a nearby bathroom sink or shower and let it run until all the trapped air is pushed out and you get a steady, unbroken stream of water. Check around your new top-cap threads for any minor leaks. Once you are 100% sure the tank is full of water and leak-free, turn your electricity or gas back on.